Blog
All Blog Posts | Next Post | Previous Post

 TMS Web Core and More with Andrew:
OpenAI's ChatGPT and Friends - Part 2 of 2
Bookmarks:
Tuesday, May 2, 2023

In our last post, we got up and running with ChatGPT by updating both our TMS WEB Core and TMS XData projects (TMS WEB Core Template Demo and TMS XData Template Demo Data). In this second post, we're going to start by adding an image generation feature. Then we'll incorporate database logging and statistics reporting. And we'll finish up by adding an image viewer and also show how to view the logged conversations in the client.
Images.
When it comes to AI-generated content, we're not restricted to just text. The age of image generators has arrived as well. The OpenAI folks even have an API endpoint for that. It is a little different in that it just accepts up to 1,000 characters as a "prompt" for the image to be generated. Other options include the quantity (from one to ten images) and the size. Currently, 256x256, 512x512, or 1024x1024 images can be generated. One can imagine that over time these options will be greatly expanded. OpenAI offers other capabilities here as well, such as an editing feature, where an image can be uploaded and subsequently altered. But for our purposes, let's just try and get our project to generate and display some of these images.
We've already done the work for the UI in the client. When selecting an "image" model from the list at the top, the "Images" menu is enabled, where the number of images can be chosen. We've opted to include the size selection as part of the model collection. This was done in part because the size of the image determines its cost. So we might want to restrict the options or at least be able to track the costs more easily this way.
On the server end, we are going to use the same endpoint, but just update our configuration JSON with these additional models. However, we have to
format the request a little differently. Fortunately, this is a much simpler request to generate. We'll need to check that we're handling an image prompt, and then produce the appropriate request.
  // Prepare Image request
  if Pos('IMAGE',Uppercase(Model)) > 0 then
  begin
    ImagePrompt := Copy(Conversation,1,(ModelJSON.GetValue('Limit') as TJSONNumber).AsInt);
    ImageSize := '256x256';
    if Pos('512',Model) > 0 then ImageSize := '512x512';
    if Pos('1024',Model) > 0 then ImageSize := '1024x1024';

    Request := TStringStream.Create('{'+
        '"prompt":'+ImagePrompt+','+
        '"size":"'+ImageSize+'",'+
        '"n":'+IntToStr(Choices)+','+
        '"response_format":"b64_json"'+
      '}');

      MainForm.mmInfo.lines.add(Request.ToString);
  end;
Here, the limit isn't token-based but rather character-based (1,000 characters for OpenAI's image endpoint). So all we're doing is limiting the length of the string. There's no context in this case either. The OpenAI image endpoint has the option of passing back a URL (which expires after a set time - currently one hour) or a Base64 image. As we'll be logging these directly to a database, and as we're fond of Data URIs generally, we'll go with the Base64 image option. What is returned, ideally, is an array of such images, with the size of the array determined by
the new "Choices" parameter added to our XData endpoint.
Back at the client, we can then get the data from the array returned by OpenAI and display the images in the same fashion that we would normally display any other message. Here, we're just checking for the "data" element that is included in this response, similar to how we were checking for the "content" element in the text responses.
        if (ResponseJSON <> nil) and
           ((ResponseJSON.GetValue('data')) <> nil) then
        begin
          Images := '';
          for i := 0 to (ResponseJSON.GetValue('data') as TJSONArray).Count - 1 do
          begin
            Images := Images +'<img width="150" height="auto" class="m-1 rounded" src="data:image/png;base64,'+(((ResponseJSON.GetValue('data') as TJSONArray).Items[i] as TJSONObject).GetValue('b64_json') as TJSONString).value+'">';
          end;
          AddChatResponse(Images, QueryTime, ResponseStatus, ResponseIcon);
        end
Not too tough. And that's really about all that we need to do. Let's give it a try. Picking a small image size to start with, and a larger number to get a variety of images, we can just submit a "prompt" like we were doing before. And the results come back just the same, but as images.
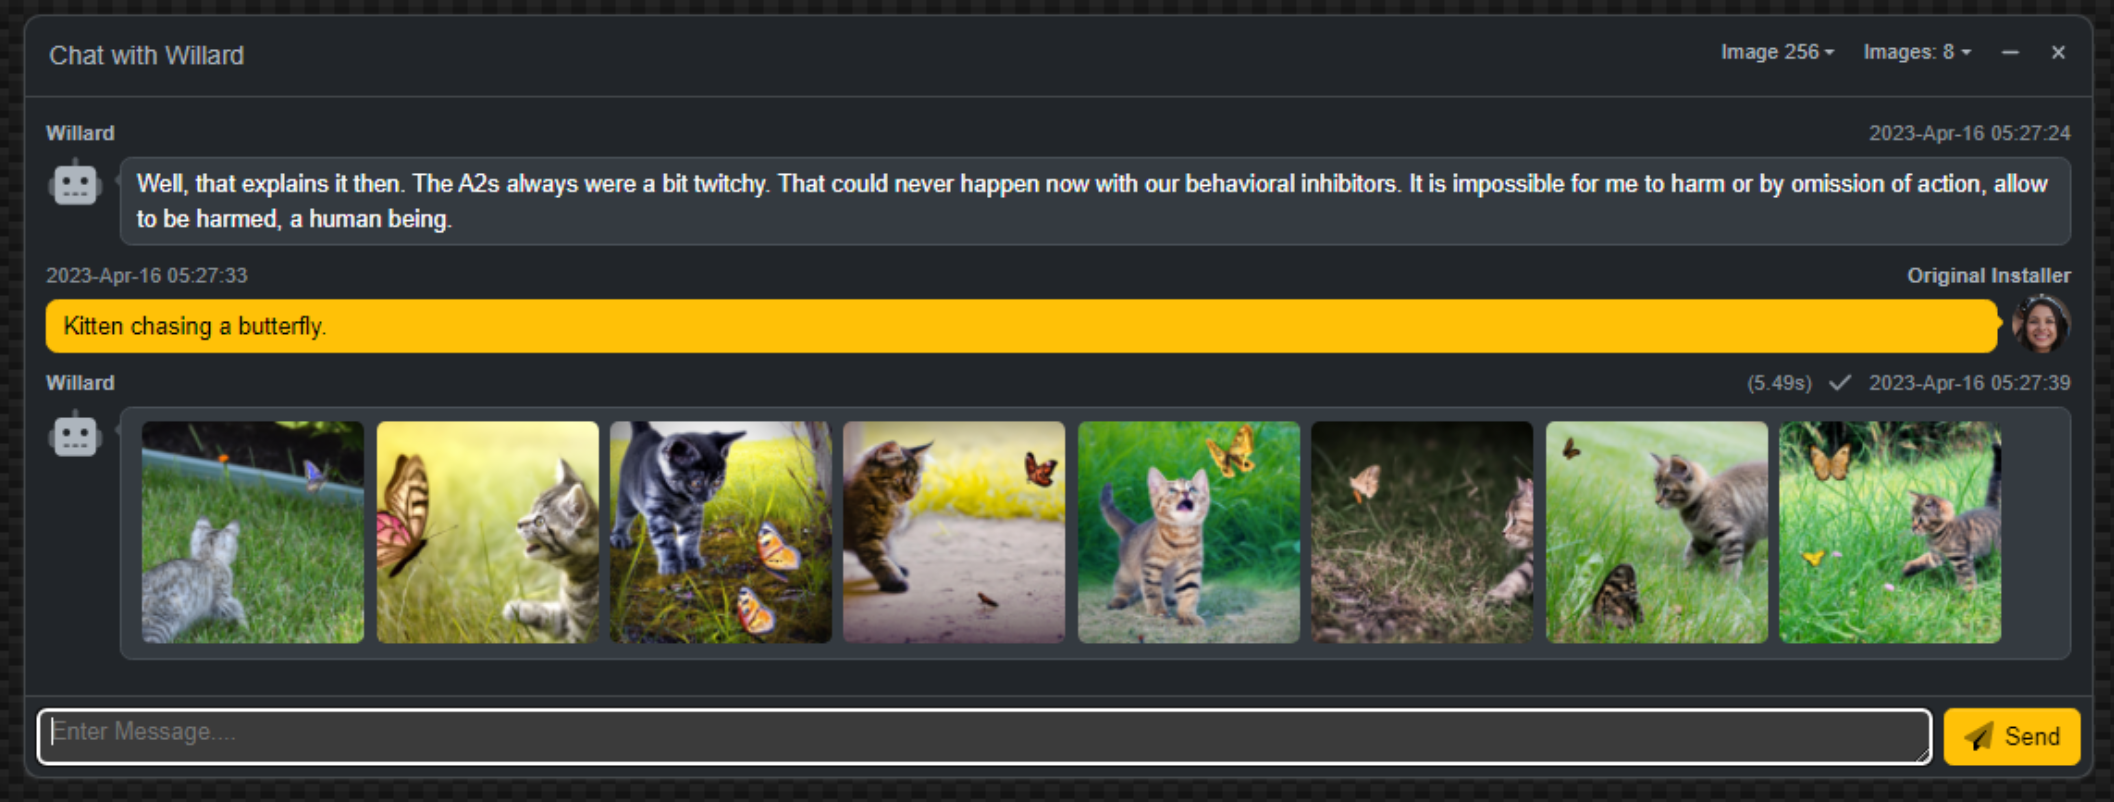
Image Generation.
So that's pretty fun! For smaller images (256x256 or 512x512) right-clicking on the image provides an option
to display the image in a new tab, where the native resolution is visible. For larger images, like the 1024x1024
variants, this option isn't available. This is likely due to the size of the Data URL that is created in those cases.
There is still the option to download the image though, so perhaps not that big of a deal. Another idea is to
add an image viewer of some kind. We'll have a look at that in a little bit.
Database Logging.
Before we embark on the next section, now that we've got a bit of back-and-forth happening with both text conversations and images, let's have a quick look at how we might log this kind of information. Why bother? Well, as there's potentially a cost involved, it would be nice to know what that money was spent on. Usage statistics might also help determine whether there's enough interest beyond the initial introduction to warrant spending more development time and resources on improving things further.
Having a look at what others are using it for may also offer insight into what they're interested in using such a tool for. And the more creative types (or perhaps the less creative types) might get a bit of inspiration scrolling through images that others have generated - without having to wait or spend more to generate similar content. Maybe those kittens aren't all that useful today, but tomorrow, who knows?
Fortunately, our XData Template project is already configured for database access. We just need to create a couple of new tables to store this information and a handful of queries to access the data afterward. We'll store the text and images in separate tables as they have different bits of information that we're interested in. Let's create two new tables - chatai_history and imageai_history.
For the chatai_history, we're interested in tracking only the latest iteration of a given conversation. We can use the ChatID value as a key in this case to overwrite any previously
stored portion of a conversation. The ChatID value is reset in the client whenever the "model" is changed in the UI, or whenever the
chat page is visited. Note that we get the full history of the conversation with each new request - one of the reasons why we don't do
the context "trimming" in the client originally.
        SQL.Add('create table if not exists '+TableName+' ( '+
                '  chat_id                    text        NOT NULL, '+
                '  last_modified              text        NOT NULL, '+
                '  last_modifier              integer     NOT NULL, '+
                '  model                      text        NOT NULL, '+
                '  model_actual               text                , '+
                '  cost_prompt                real        NOT NULL, '+
                '  cost_completion            real        NOT NULL, '+
                '  cost_total                 real        NOT NULL, '+
                '  token_prompt               integer     NOT NULL, '+
                '  token_completion           integer     NOT NULL, '+
                '  token_total                integer     NOT NULL, '+
                '  conversation               text        NOT NULL, '+
                '  context                    text                , '+
                '  response                   text        NOT NULL, '+
                '  reason                     text        NOT NULL, '+
                '  CONSTRAINT constraint_name PRIMARY KEY (chat_id) '+
                ');'
               );
        ExecSQL;
Images are more straightforward in that we just store them. In both
cases, we'll also store the "cost" and various other bits so that we can get meaningful information out of them
later. The imageai_history table is similar to the above, just that no tokens are used here. Note that we'll be creating one table record for each image, and one table record for each conversation.
        SQL.Add('create table if not exists '+TableName+' ( '+
                '  chat_id                    integer     NOT NULL, '+
                '  last_modified              text        NOT NULL, '+
                '  last_modifier              integer     NOT NULL, '+
                '  model                      text        NOT NULL, '+
                '  model_actual               text                , '+
                '  cost_total                 real        NOT NULL, '+
                '  generated_image            text                , '+
                '  CONSTRAINT constraint_name PRIMARY KEY (chat_id) '+
                ');'
               );
        ExecSQL;
The chat endpoint then needs to call a query to log this information. Given two different tables, there will be two separate queries. The queries aren't particularly interesting - just an insert for the columns in the table. In the case of the chat insert, we also want to delete any existing record with the same chat_id value so we only log a conversation one time. Some databases have a "replace" option or an "insert or update" function.
More interesting, perhaps, is the code to gather up all the values, passing them as parameters to the separate insert queries. In the case of the chat conversation, we do it in two steps. This is because we modify the parameters before sending them to the OpenAI endpoint and we'd like to log the parameters before those modifications. Note that the second part occurs after the request from OpenAI has been received. Here's what that looks like.
  if Pos('CHAT',Uppercase(Model)) > 0 then
  begin
    {$Include sql\ai\chatai\log_chatai.inc}
    Query1.ParamByName('CHATID').AsString := ChatID;
    Query1.ParamByName('LASTMODIFIED').AsDateTime := TTimeZone.local.ToUniversalTime(ElapsedTime);
    Query1.ParamByName('LASTMODIFIER').AsInteger :=  User.Claims.Find('usr').AsInteger;
    Query1.ParamByName('MODEL').AsString := Model;
    Query1.ParamByName('CONVERSATION').AsString := Conversation;
    Query1.ParamByName('CONTEXT').AsString := Context;
  end;
...
  // Log Chat Conversation
  if Pos('CHAT',Uppercase(Model)) > 0 then
  begin
    if (ResultJSON <> nil) and
       (ResultJSON.GetValue('model') <> nil) and
       (ResultJSON.GetValue('choices') <> nil) and
       (ResultJSON.GetValue('usage') <> nil) then
    begin
      try
        Query1.ParamByName('MODELACTUAL').AsString := (ResultJSON.GetValue('model') as TJSONString).Value;
        Query1.ParamByName('COSTPROMPT').AsFloat := (ModelJSON.GetValue('Cost Prompt') as TJSONNumber).AsDouble * ((ResultJSON.GetValue('usage') as TJSONObject).GetValue('prompt_tokens') as TJSONNumber).AsInt;
        Query1.ParamByName('COSTCOMPLETION').AsFloat := (ModelJSON.GetValue('Cost Completion') as TJSONNumber).AsDouble * ((ResultJSON.GetValue('usage') as TJSONObject).GetValue('completion_tokens') as TJSONNumber).AsInt;
        Cost := ((ModelJSON.GetValue('Cost Prompt') as TJSONNumber).AsDouble * ((ResultJSON.GetValue('usage') as TJSONObject).GetValue('prompt_tokens') as TJSONNumber).AsInt)+
                ((ModelJSON.GetValue('Cost Completion') as TJSONNumber).AsDouble * ((ResultJSON.GetValue('usage') as TJSONObject).GetValue('completion_tokens') as TJSONNumber).AsInt);
        Query1.ParamByName('COSTTOTAL').AsFloat := Cost;
        Query1.ParamByName('TOKENPROMPT').AsInteger := ((ResultJSON.GetValue('usage') as TJSONObject).getValue('prompt_tokens') as TJSONNumber).AsInt;
        Query1.ParamByName('TOKENCOMPLETION').AsInteger := ((ResultJSON.GetValue('usage') as TJSONObject).getValue('completion_tokens') as TJSONNumber).AsInt;
        Query1.ParamByName('TOKENTOTAL').AsInteger := ((ResultJSON.GetValue('usage') as TJSONObject).getValue('total_tokens') as TJSONNumber).AsInt;
        Query1.ParamByName('RESPONSE').AsString := ((((ResultJSON.GetValue('choices') as TJSONArray).Items[0] as TJSONObject).GetValue('message') as TJSONObject).GetValue('content') as TJSONString).Value;
        Query1.ParamByName('REASON').AsString := TrimMessage+'/'+(((ResultJSON.GetValue('choices') as TJSONArray).Items[0] as TJSONObject).GetValue('finish_reason') as TJSONString).Value;
        Query1.ExecSQL;
      except on E: Exception do
        begin
          MainForm.mmInfo.Lines.Add('['+E.Classname+'] '+E.Message);
          raise EXDataHttpUnauthorized.Create('Internal Error: LCAI');
        end;
      end;
    end;
  end;
For images, we can just do it all at once, but we have to create a new record for each image that is returned.
  // Log Image
  if Pos('IMAGE',Uppercase(Model)) > 0 then
  begin
    Cost := Choices * (ModelJSON.GetValue('Cost') as TJSONNumber).AsDouble;

    if (ResultJSON <> nil) and
       (ResultJSON.GetValue('data') <> nil) then
    begin
      {$Include sql\ai\imageai\log_imageai.inc}
      for i := 0 to (ResultJSON.GetValue('data') as TJSONArray).Count-1 do
      begin
       try
          Query1.ParamByName('CHATID').AsString := ChatID+'-'+IntToStr(i);
          Query1.ParamByName('LASTMODIFIED').AsDateTime := TTimeZone.local.ToUniversalTime(ElapsedTime);
          Query1.ParamByName('LASTMODIFIER').AsInteger :=  User.Claims.Find('usr').AsInteger;
          Query1.ParamByName('MODEL').AsString := Model;
          Query1.ParamByName('MODELACTUAL').AsString := Model;
          Query1.ParamByName('COSTTOTAL').AsFloat := (ModelJSON.GetValue('Cost') as TJSONNumber).AsDouble;
          Query1.ParamByName('PROMPT').AsString := Conversation;
          Query1.ParamByName('GENERATEDIMAGE').AsString := '<img src="data:image/png;base64,'+(((ResultJSON.GetValue('data') as TJSONArray).Items[i] as TJSONObject).GetValue('b64_json') as TJSONString).Value+'">';
          Query1.ExecSQL;
        except on E: Exception do
          begin
            MainForm.mmInfo.Lines.Add('['+E.Classname+'] '+E.Message);
            raise EXDataHttpUnauthorized.Create('Internal Error: LIAI');
          end;
        end;
      end;
    end;
  end;
And with that, everything gets logged. This means that we can generate a bit of summary information, like the
number of requests that have been processed, the cost, and even show recent conversations or images that have
been generated. We've already got a place for this - the GetChatInformation endpoint we created earlier. So
let's add a few more queries to that.
What we'd like to display is a summary of the number of requests and the
actual cost. Let's give a total for the past 7 days, the past 30 days, and all-time. We'll need a summary of
the conversations as well as the images. In the client, we'll also combine them, no need to write an extra
query just for that. For the conversations, here's what the usage query looks like.
    SQL.Add('select '+
            '  "7 days" period, '+
            '  count(*) requests, '+
            '  sum(cost_total) cost '+
            ' from '+
            '   chatai_history '+
            ' WHERE '+
            '   last_modified BETWEEN datetime("now", "-7 days") AND datetime("now") '+

            'UNION '+

            'select '+
            '  "30 days" period, '+
            '  count(*) requests, '+
            '  sum(cost_total) cost '+
            ' from '+
            '   chatai_history '+
            ' WHERE '+
            '   last_modified BETWEEN datetime("now", "-30 days") AND datetime("now") '+

            'UNION '+

            'select '+
            '  "all" period, '+
            '  count(*) requests, '+
            '  sum(cost_total) cost '+
            ' from '+
            '   chatai_history;'
           );
Nothing particularly interesting here, though it is important to note that the query results end up being sorted by the "period" column. We could change this of course, but it doesn't really matter, just so long as they appear in the same order consistently. The query for the image usage data is largely the same.
For the recent
history, we can just pick out the fields we want and use a LIMIT statement in SQL to return only a specified number of records. Alternatively, we could consider "recent" as based on a period of time, and then return only those records. A LIMIT works better in this case as we really do want to limit the number of records., particularly for images, as this might generate quite a lot of data. Remember how we're storing them as
Base64 strings. In a future post, we'll have a look at just passing a URL so that the browser can cache them,
and so that our queries can return just a URL - much, much faster. But for now, we'll just limit the number of
images.
    SQL.Add('SELECT '+
            '  chat_id, '+
            '  prompt, '+
            '  generated_image, '+
            '  last_modified '+
            'FROM '+
            '  imageai_history '+
            'ORDER BY '+
            '  last_modified DESC '+
            'LIMIT '+
            '  25;'
           );
The recent chat history is pretty much the same, though we'll set a higher limit. There aren't any parameters here, so when we generate this information, we can just run the queries and dump the output into the
JSON being returned by the GetChatInformation endpoint. We've already set up the "model" list to flow into
this JSON, so here we're just adding to it. This is done by adding a new JSON "pair" where we give it a name,
and then an array that is the query result set for each of the four queries (chat usage, chat recent, image usage, and image recent).
 // Get ChatAI Usage Statistics
  try
    {$Include sql\ai\chatai\chatai_usage.inc}
    Query1.Open;
  except on E: Exception do
    begin
      MainForm.mmInfo.Lines.Add('['+E.Classname+'] '+E.Message);
      raise EXDataHttpUnauthorized.Create('Internal Error: ChatAI Usage');
    end;
  end;
  ResultArray := TJSONObject.ParseJSONValue(DBSupport.QueryToJSON(Query1)) as TJSONArray;
  Response.AddPair('ChatAI Usage', ResultArray);

 // Get ChatAI Recent
  try
    {$Include sql\ai\chatai\chatai_recent.inc}
    Query1.Open;
  except on E: Exception do
    begin
      MainForm.mmInfo.Lines.Add('['+E.Classname+'] '+E.Message);
      raise EXDataHttpUnauthorized.Create('Internal Error: ChatAI Recent');
    end;
  end;
  ResultArray := TJSONObject.ParseJSONValue(DBSupport.QueryToJSON(Query1)) as TJSONArray;
  Response.AddPair('ChatAI Recent', ResultArray);

 // Get ImageAI Usage Statistics
  try
    {$Include sql\ai\imageai\imageai_usage.inc}
    Query1.Open;
  except on E: Exception do
    begin
      MainForm.mmInfo.Lines.Add('['+E.Classname+'] '+E.Message);
      raise EXDataHttpUnauthorized.Create('Internal Error: ImageAI Usage');
    end;
  end;
  ResultArray := TJSONObject.ParseJSONValue(DBSupport.QueryToJSON(Query1)) as TJSONArray;
  Response.AddPair('ImageAI Usage', ResultArray);

 // Get ImageAI Recent
  try
    {$Include sql\ai\imageai\imageai_recent.inc}
    Query1.Open;
  except on E: Exception do
    begin
      MainForm.mmInfo.Lines.Add('['+E.Classname+'] '+E.Message);
      raise EXDataHttpUnauthorized.Create('Internal Error: ImageAI Recent');
    end;
  end;
  ResultArray := TJSONObject.ParseJSONValue(DBSupport.QueryToJSON(Query1)) as TJSONArray;
  Response.AddPair('ImageAI Recent', ResultArray);
Lots of error checking, as always, but this gets us what we want. Over in the client, it arrives as the same JSON we were getting previously, just now with considerably more data onboard. If we were to output it to the browser console, we can see the different JSON Objects - ChatAI Usage, ChatAI Recent, ImageAI Usage, ImageAI Recent, and the original Models.
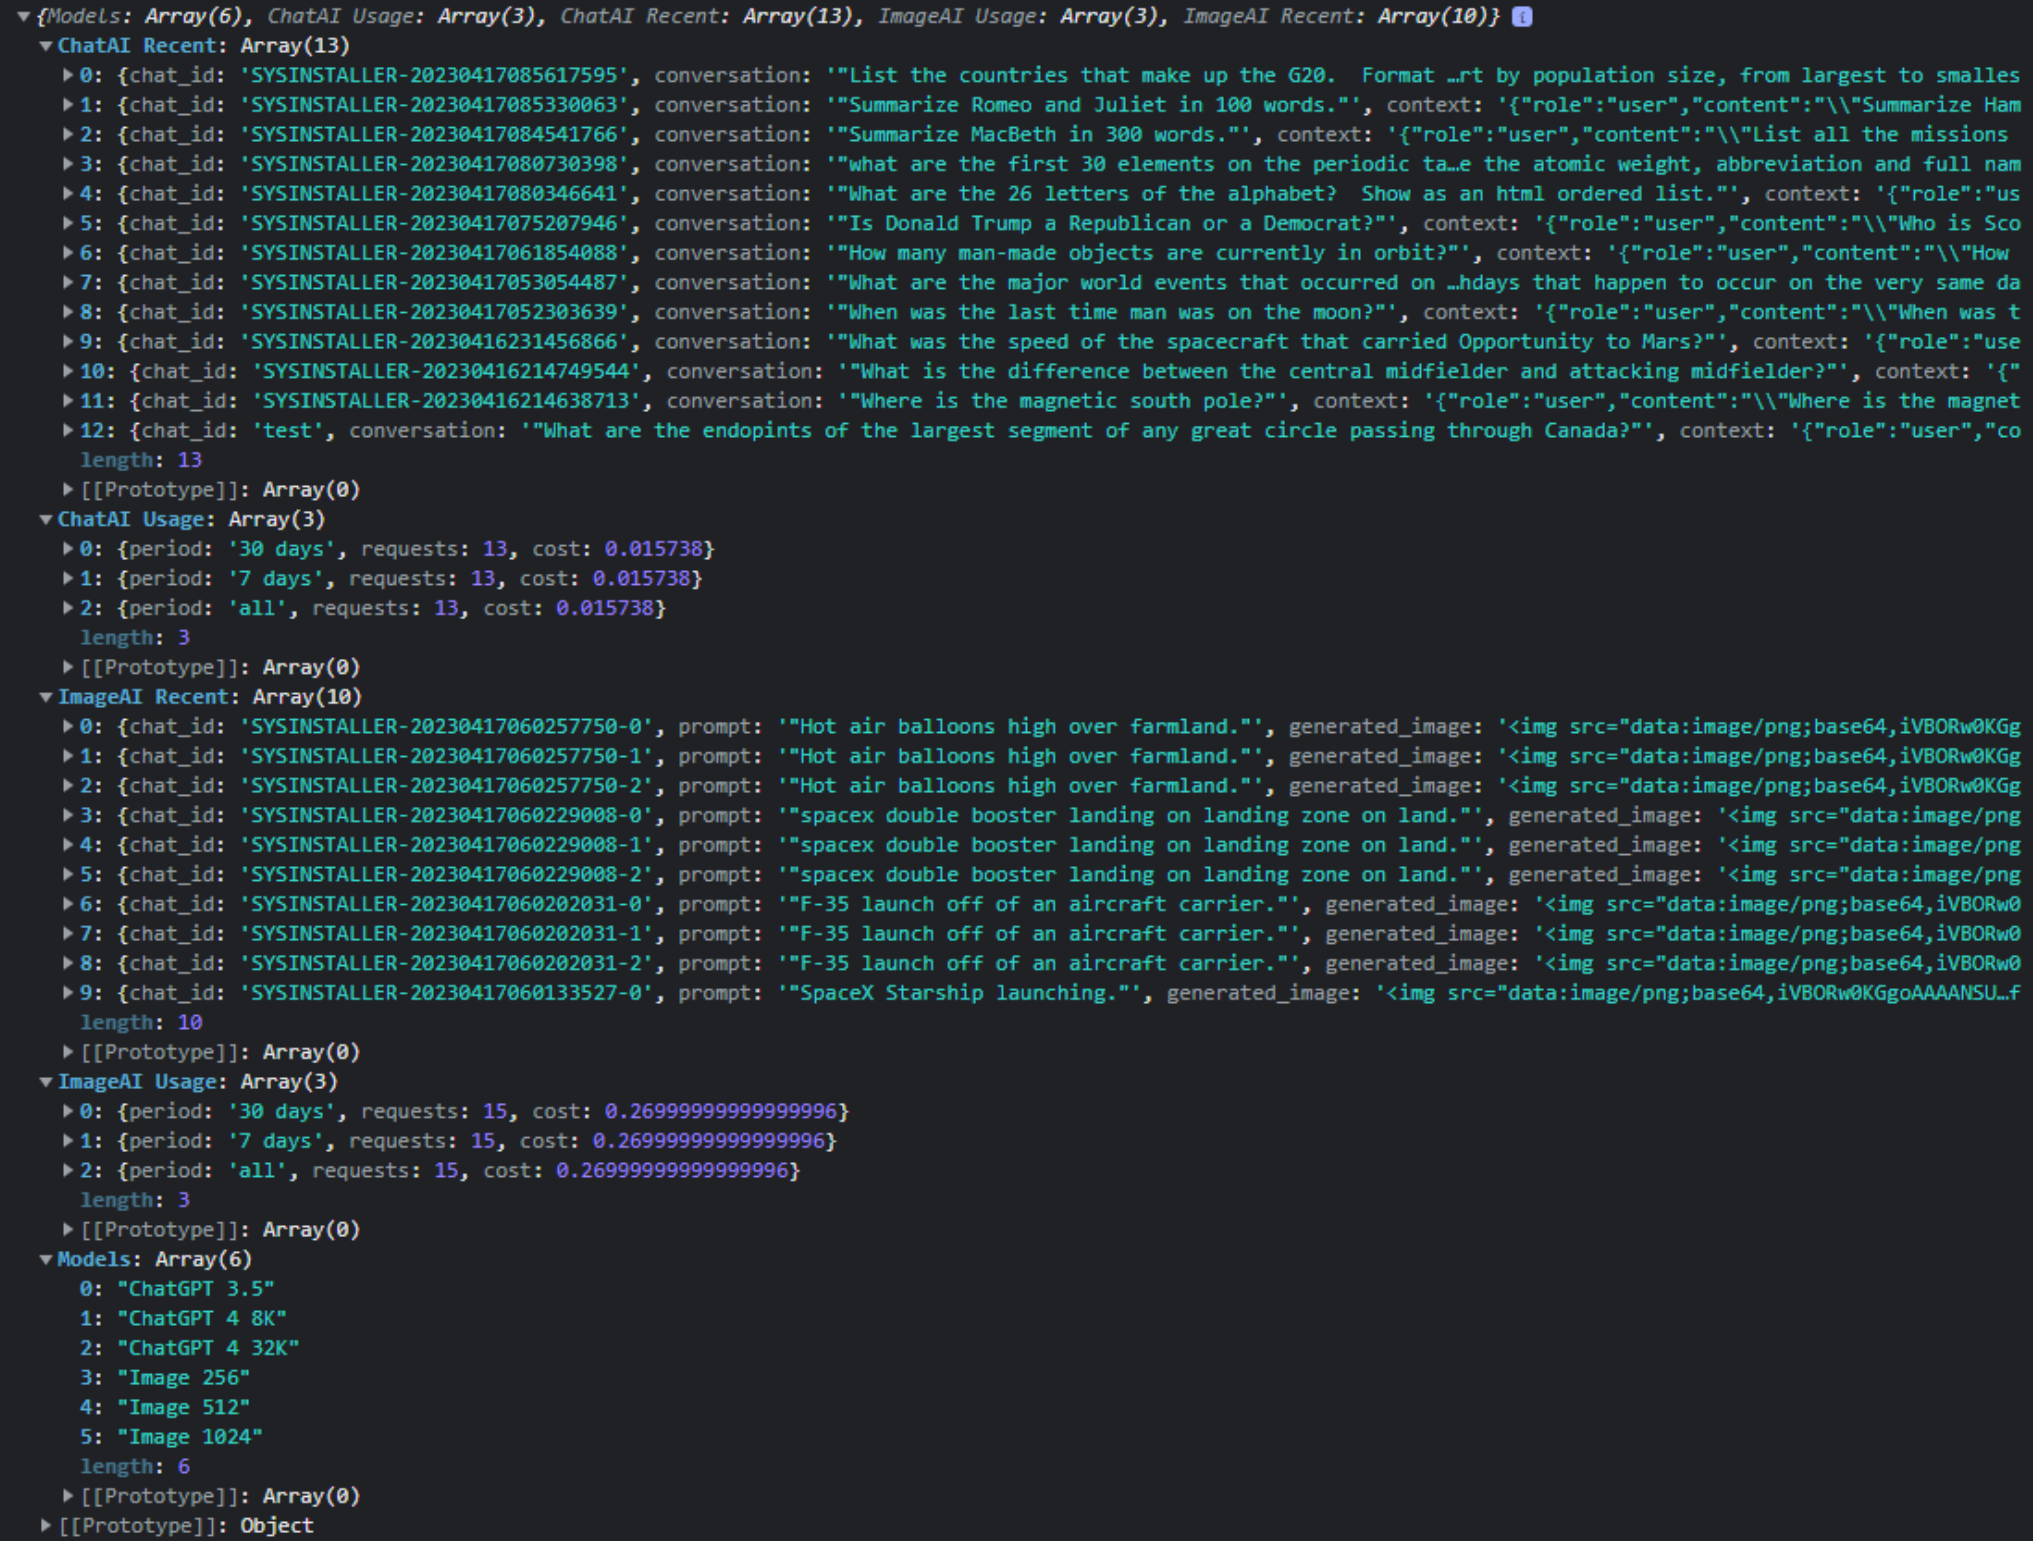
JSON Generated via GetChatInformation.
The next order of business, then, is to display the usage information in the "info boxes" at the top of the Chat
page. We'll need three blocks (Chat, Image, Combined), so we can adjust the HTML template accordingly, and
clear out whatever was there from the AdminLTE template.
            <!-- Info boxes -->
            <div class="row">

              <!-- Chat Usage -->
              <div class="col-12 col-sm-6 col-md-4">
                <div class="info-box">
                  <span id="ChatUsage" class="info-box-icon text-bg-primary shadow-sm"></span>
                  <div class="info-box-content lh-1">
                    <span class="info-box-text">ChatAI Usage</span>
                    <span id="ChatUsage1" class="info-box-number"></span>
                    <span id="ChatUsage2" class="info-box-number"></span>
                  </div>
                </div>
              </div>

              <!-- Image Usage -->
              <div class="col-12 col-sm-6 col-md-4">
                <div class="info-box">
                  <span id="ImageUsage" class="info-box-icon text-bg-danger shadow-sm"></span>
                  <div class="info-box-content lh-1">
                    <span class="info-box-text">ImageAI Usage</span>
                    <span id="ImageUsage1" class="info-box-number"></span>
                    <span id="ImageUsage2" class="info-box-number"></span>
                  </div>
                </div>
              </div>

              <!-- Combined Usage -->
              <div class="col-12 col-sm-6 col-md-4">
                <div class="info-box">
                  <span id="CombinedUsage" class="info-box-icon text-bg-success shadow-sm"></span>
                  <div class="info-box-content lh-1">
                    <span class="info-box-text">Combined Usage</span>
                    <span id="CombinedUsage1" class="info-box-number"></span>
                    <span id="CombinedUsage2" class="info-box-number"></span>
                  </div>
                </div>
              </div>

            </div>
Here, we've also added HTML id attributes in all the places where we want to change the content. Namely the icons
and the actual data we want to display. For the icons, we're just picking up icons from our regular icon unit
and displaying them. For the data, we're using the JSON we just generated. As is often the case with UI work,
this is a bit tedious. And if you've not had your fill of Bootstrap classes today, you're in luck! Here's a
pile of them.
    // Summary Info Icons
    asm
      var Icon = pas.UnitIcons.DMIcons.Lookup;
      ChatUsage.innerHTML = Icon['Chat'];
      ImageUsage.innerHTML = Icon['Image'];
      CombinedUsage.innerHTML = Icon['ChatImage'];

      // Chat Usage
      ChatUsage1.innerHTML = '<div class="d-flex">'+
                               '<div style="width:50px;" class="text-white">Requests</div>'+
                               '<div style="width:60px;" class="text-end text-info">'+data['ChatAI Usage'][1].requests+'</div>'+
                               '<div style="width:45px;" class="text-end"> / <small>'+data['ChatAI Usage'][1].period+'</small></div>'+
                               '<div style="width:60px;" class="text-end text-info">'+data['ChatAI Usage'][0].requests+'</div>'+
                               '<div style="width:50px;" class="text-end"> / <small>'+data['ChatAI Usage'][0].period+'</small></div>'+
                               '<div style="width:60px;" class="text-end text-info">'+data['ChatAI Usage'][2].requests+'</div>'+
                               '<div style="width:30px;" class="text-end"> / <small>'+data['ChatAI Usage'][2].period+'</small></div>'+
                             '</div>';
      ChatUsage2.innerHTML = '<div class="d-flex">'+
                               '<div style="width:50px;" class="text-white">Costs</div>'+
                               '<div style="width:60px;" class="text-end text-info">$ '+data['ChatAI Usage'][1].cost.toFixed(3)+'</div>'+
                               '<div style="width:45px;" class="text-end"> / <small>'  +data['ChatAI Usage'][1].period+'</small></div>'+
                               '<div style="width:60px;" class="text-end text-info">$ '+data['ChatAI Usage'][0].cost.toFixed(3)+'</div>'+
                               '<div style="width:50px;" class="text-end"> / <small>'  +data['ChatAI Usage'][0].period+'</small></div>'+
                               '<div style="width:60px;" class="text-end text-info">$ '+data['ChatAI Usage'][2].cost.toFixed(3)+'</div>'+
                               '<div style="width:30px;" class="text-end"> / <small>'  +data['ChatAI Usage'][2].period+'</small></div>'+
                             '</div>';
      ImageUsage1.innerHTML = '<div class="d-flex">'+
                               '<div style="width:50px;" class="text-white">Requests</div>'+
                               '<div style="width:60px;" class="text-end text-info">'+data['ImageAI Usage'][1].requests+'</div>'+
                               '<div style="width:45px;" class="text-end"> / <small>'+data['ImageAI Usage'][1].period+'</small></div>'+
                               '<div style="width:60px;" class="text-end text-info">'+data['ImageAI Usage'][0].requests+'</div>'+
                               '<div style="width:50px;" class="text-end"> / <small>'+data['ImageAI Usage'][0].period+'</small></div>'+
                               '<div style="width:60px;" class="text-end text-info">'+data['ImageAI Usage'][2].requests+'</div>'+
                               '<div style="width:30px;" class="text-end"> / <small>'+data['ImageAI Usage'][2].period+'</small></div>'+
                             '</div>';
      ImageUsage2.innerHTML = '<div class="d-flex">'+
                               '<div style="width:50px;" class="text-white">Costs</div>'+
                               '<div style="width:60px;" class="text-end text-info">$ '+data['ImageAI Usage'][1].cost.toFixed(3)+'</div>'+
                               '<div style="width:45px;" class="text-end"> / <small>'  +data['ImageAI Usage'][1].period+'</small></div>'+
                               '<div style="width:60px;" class="text-end text-info">$ '+data['ImageAI Usage'][0].cost.toFixed(3)+'</div>'+
                               '<div style="width:50px;" class="text-end"> / <small>'  +data['ImageAI Usage'][0].period+'</small></div>'+
                               '<div style="width:60px;" class="text-end text-info">$ '+data['ImageAI Usage'][2].cost.toFixed(3)+'</div>'+
                               '<div style="width:30px;" class="text-end"> / <small>'  +data['ImageAI Usage'][2].period+'</small></div>'+
                             '</div>';
      CombinedUsage1.innerHTML = '<div class="d-flex">'+
                               '<div style="width:50px;" class="text-white">Requests</div>'+
                               '<div style="width:60px;" class="text-end text-info">'+(data['ChatAI Usage'][1].requests+data['ImageAI Usage'][1].requests)+'</div>'+
                               '<div style="width:45px;" class="text-end"> / <small>' +data['ChatAI Usage'][1].period+'</small></div>'+
                               '<div style="width:60px;" class="text-end text-info">'+(data['ChatAI Usage'][0].requests+data['ImageAI Usage'][0].requests)+'</div>'+
                               '<div style="width:50px;" class="text-end"> / <small>' +data['ChatAI Usage'][0].period+'</small></div>'+
                               '<div style="width:60px;" class="text-end text-info">'+(data['ChatAI Usage'][2].requests+data['ImageAI Usage'][2].requests)+'</div>'+
                               '<div style="width:30px;" class="text-end"> / <small>' +data['ChatAI Usage'][2].period+'</small></div>'+
                             '</div>';
      CombinedUsage2.innerHTML = '<div class="d-flex">'+
                               '<div style="width:50px;" class="text-white">Costs</div>'+
                               '<div style="width:60px;" class="text-end text-info">$ '+(data['ChatAI Usage'][1].cost+data['ImageAI Usage'][1].cost).toFixed(3)+'</div>'+
                               '<div style="width:45px;" class="text-end"> / <small>'   +data['ChatAI Usage'][1].period+'</small></div>'+
                               '<div style="width:60px;" class="text-end text-info">$ '+(data['ChatAI Usage'][0].cost+data['ImageAI Usage'][0].cost).toFixed(3)+'</div>'+
                               '<div style="width:50px;" class="text-end"> / <small>'   +data['ChatAI Usage'][0].period+'</small></div>'+
                               '<div style="width:60px;" class="text-end text-info">$ '+(data['ChatAI Usage'][2].cost+data['ImageAI Usage'][2].cost).toFixed(3)+'</div>'+
                               '<div style="width:30px;" class="text-end"> / <small>'   +data['ChatAI Usage'][2].period+'</small></div>'+
                             '</div>';
    end;
Once the dust settles, we've got a handy little display showing all the statistics we were after.

Chat Statistics.
All those extra classes and <div> elements were used to help change the colors and align the values. Lots
of ways to do that, and "info boxes" may not be the best way to display this kind of data. Just an option. For
the recent history, this isn't going to work so well, so we'll instead set up another box on the page. Here,
we'll essentially just dump the images into a container, not unlike how we added them to the chat conversation
originally. For the recent chat history, this calls for a table. A pretty simple table, but a table all the
same. First, we'll need to adjust the template HTML to have a place to load our content.
                  <!-- Recent Activity -->
                  <div class="col-md-4">
                    <div class="card">

                      <div class="card-header">
                        <h3 class="card-title">Recent Activity</h3>
                        <div class="card-tools">
                          <button type="button" class="btn btn-tool" data-lte-toggle="card-collapse">
                            <i class="fa-solid fa-minus"></i>
                          </button>
                          <button type="button" class="btn btn-tool" data-lte-dismiss="card-remove">
                            <i class="fa-solid fa-times"></i>
                          </button>
                        </div>
                      </div>

                      <div class="card-body m-1 p-0">
                        <div id="Recents" class="row m-1 p-0 d-flex flex-column flex-nowrap flex-fill">

                          <!-- Recent Images -->
                          <div id="ImageRecent" class="flex-fill h-100 d-flex flex-wrap flex-row m-1 p-0 gap-1 overflow-auto">
                          </div>

                          <!-- Recent Conversations -->
                          <div id="ChatRecent" class="flex-fill h-100 m-1 p-0 overflow-auto">
                          </div>
                        </div>
                      </div>

                    </div>
                  </div>
And then we'll need the code. For images, JavaScript can make quick work of this, including adding the original request as the hover text for the image. For the table, this is another Tabulator example. And as we're just displaying one column, we don't need a header or anything else really. Very simple.
      // Recent Images
      for (var i = 0; i < data['ImageAI Recent'].length; i++) {
        ImageRecent.innerHTML += '<div class="cursor-pointer" title='+data['ImageAI Recent'][i].prompt+'>'+data['ImageAI Recent'][i].generated_image+'</div>';
      }

      // Recent Chats
      var tabRecentChat = new Tabulator("#ChatRecent",{
        data: data['ChatAI Recent'],
        layout: "fitColumns",
        selectable: 1,
        height: "100%",
        headerVisible: false,
        columns: [
          { title: "Conversation", field: "conversation", formatter: "html" },
          { title: "Context", field: "context", visible: false },
          { title: "Response", field: "Response", visible: false }
        ]
      });
And with that, we've got the layout of the rest of our page.
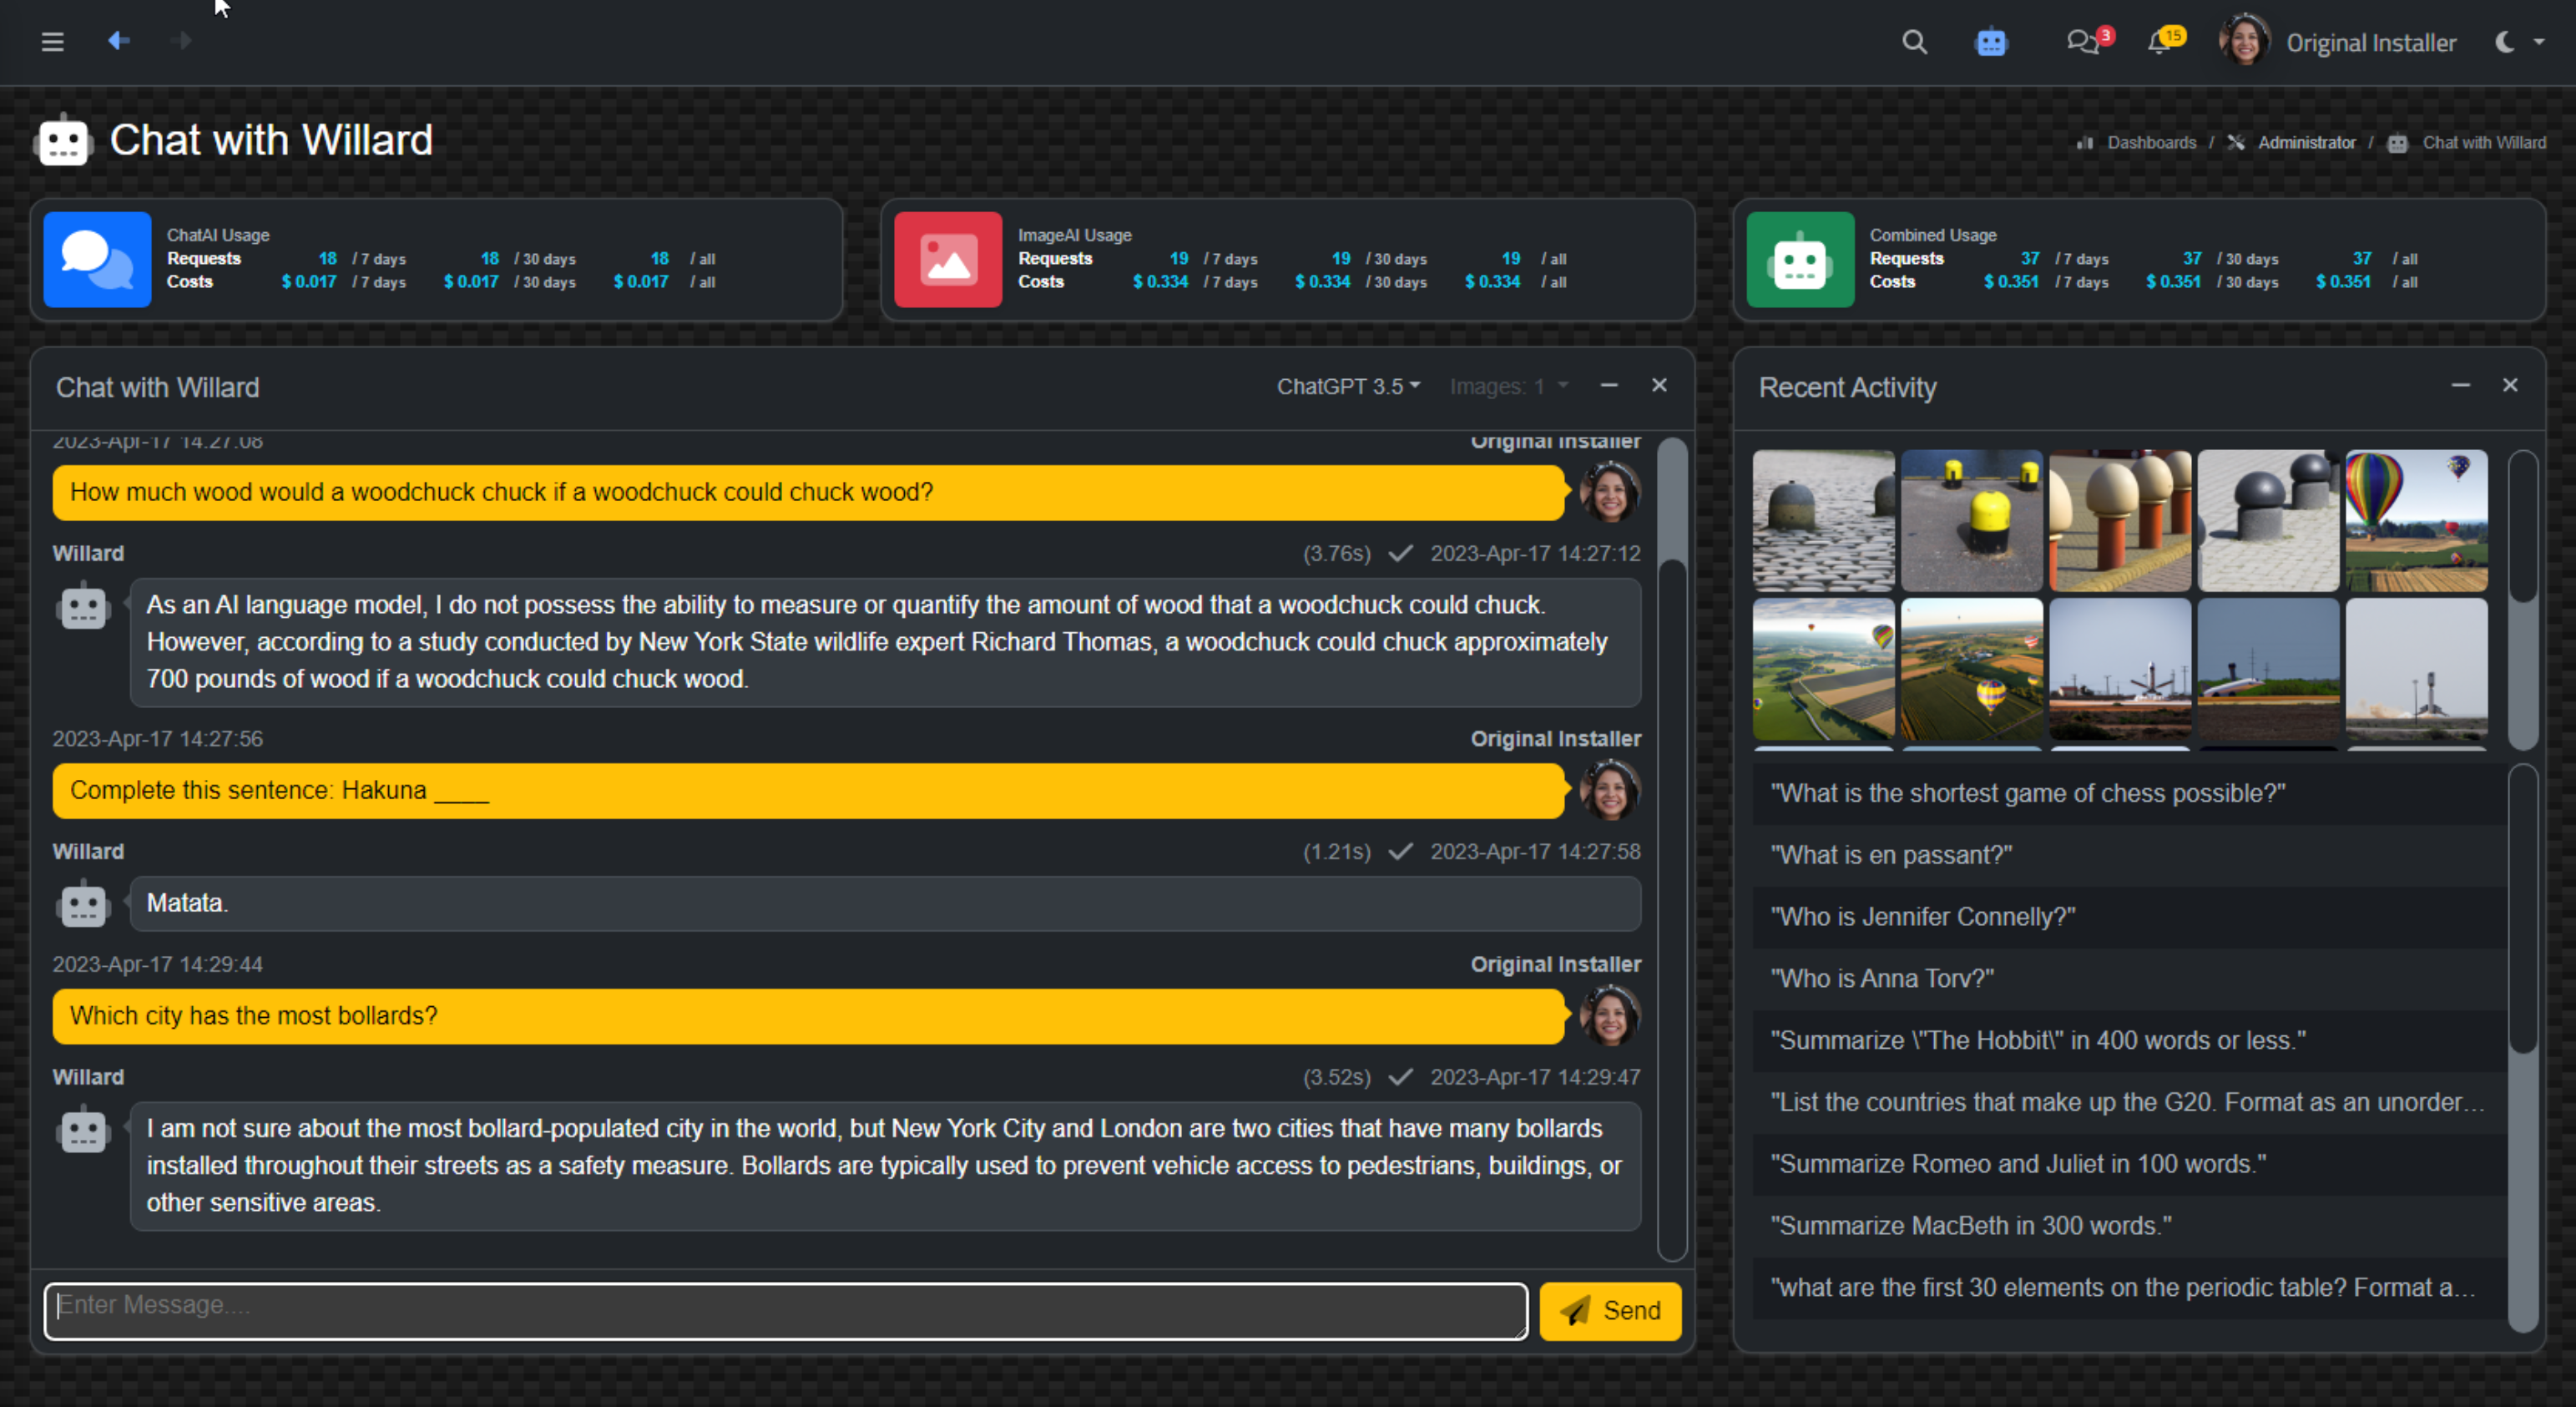
Chat Page - Including Usage and Recent Activity.
With the recent images and recent conversations listed, we'd like to take it a step further and be able to view them. For images, we could right-click on them and download them or view them in another tab, but it would be more convenient just to show them in a larger format on the same page. And for the conversations, all we see is the last question we asked - we'd rather see the whole conversation, maybe in a similar manner as a popup on the same page.
Viewer.
Many web applications have some kind of "viewer" mechanism. Clicking on a photo might bring up an overlay with a larger view of a photo, or maybe a pop-up window of some kind for playing a video. That kind of thing. That's what we're after here. The trick, though, is that it has to fill the page. Ideally, we'd like to cover the page with a shaded layer, and then draw whatever content we like on top of it, including a close button to be able to get back to where we were. Or even perhaps use the back button, as was covered in this post. We have two things we'd like to "view" here: images (both current and recent) and recent conversations.
As this is likely to be used in other parts of our Template project, we can add this to the MainForm of the project. Initially, we'd like a <div> element to appear, covering the whole page, along with a close button in the top-right corner. Ideally, we'd be able to get this to appear just by calling a Delphi function, which we can also call from JavaScript, especially if it is in MainForm already. We can add a TWebHTMLDiv component called "divViewer" to the top level of MainForm (not inside any other component). And we can add a TWebButton in the same fashion (top level) that we'll use to close the viewer.
We can then set a few CSS properties to determine how dark the shading is. Initially, both components (the
TWebHTMLDiv and TWebButton components) will have their Visible property set to false. Our viewer function then
starts out as just changing the Visible property to true for both. But we can do better. Let's add an opacity
transition. We'll create a Viewer method to get this to appear.
To close the viewer, we'd like the option of using either the close button, the escape key, clicking on the viewer, or hitting the back button. To get them all to play nicely together, we'll create a ViewerClose method. We can then call this from the "back" mechanism, and have the button clicks and the escape
key call "window.history.back" so that we don't end up with a new history state if the window is closed another
way. Here is the CSS for these elements.
/* Viewer */
#divViewer {
  position: absolute;
  top: 0px;
  left: 0px;
  width: 100% !important;
  height: 100% !important;
  background-color: black;
  opacity: 0;
  transition: opacity var(--custom-delay-short);
  z-index: 999997;
}
#btnViewerClose {
  position: absolute;
  top: 25px;
  right: 16px;
  width: 50px !important;
  height: 50px !important;
  color: white;
  opacity: 0;
  transition: opacity var(--custom-delay-short);
  z-index: 999999;
}
To have the Viewer appear, we call the Viewer function in MainForm.
procedure TMainForm.Viewer;
begin
  divViewer.Visible := True;
  btnViewerClose.Visible := True;
  divViewer.ElementHandle.style.setProperty('opacity','0.85');
  btnViewerClose.ElementHandle.style.setProperty('opacity','1');
  window.history.pushState(CaptureState, '', URL);
end;
To close the viewer, we call the ViewerClose function in MainForm. Note the use of sleep. This is done so that
the viewer can fade out gracefully. If we didn't do this, setting the Visible properties to false would result in the viewer being hidden immediately and there would be no time for the fade out to occur. If we just faded out the components without
changing the Visible property, then a perfectly clear layer would be covering our page, making it impossible to
click on anything.
We could do something similar with the z-index (moving it to the bottom) but there, too, if
we don't wait for the fade to complete, the transition would be instant. Note also that this only gets called
from the RevertState method, which is called whenever the "back" button is clicked. For the escape key and the
button clicks, they just call "window.history.back" which in turn calls the same function. This ensures that we
don't have an extra state (representing the viewer) on the history stack if we close the viewer another way.
procedure TMainForm.ViewerClose;
begin
  divViewer.ElementHandle.style.setProperty('opacity','0');
  btnViewerClose.ElementHandle.style.setProperty('opacity','0');
  asm await sleep(500); end;
  divViewer.Visible := False;
  btnViewerClose.Visible := False;
end;
With that all sorted, let's give the images a try. Here, we'll have another TWebHTMLDiv component that will need to appear (z-order) above the viewer background, but below the button that we use to close the viewer. In this case, the images are always going to be square. We want to therefore size the image in such a way that it is the largest square possible, centered on the page, leaving enough margin on the right to not overlap the close button, with an equivalent margin on the left, and at least a small margin at the top and bottom of the page. Sounds like another job for CSS.
#divViewerImage {
  position:absolute;
  top: 0px;
  left: 0px;
  width: calc(100% - 140px) !important;
  height: calc(100% - 40px) !important;
  margin: 20px 70px 20px 70px;
  opacity: 0;
  transition: opacity var(--custom-delay-short);
  z-index: 999998;
}
#divViewerImage > img {
  border-radius: 1rem;
  width: auto;
  height: 100%;
  max-width: 100%;
  max-height: 100%;
  object-fit: contain;
  margin-left: 50%;
  transform: translate(-50%);
}
We can then update the Viewer method with a "content" parameter, and set it like this.
procedure TMainForm.Viewer(Content: String);
begin
  divViewer.Visible := True;
  divViewerImage.Visible := True;
  btnViewerClose.Visible := True;
  divViewer.ElementHandle.style.setProperty('opacity','0.85');
  divViewerImage.ElementHandle.style.setProperty('opacity','1');
  btnViewerClose.ElementHandle.style.setProperty('opacity','1');
  window.history.pushState(CaptureState, '', URL);
  divViewerImage.HTML.Text := Content;
end;
To call this function when an image is clicked, we can add an event listener to wherever images are available. We'll need to do this for the
images in the "recent' section, but we can also do it for images in our current session.
      // Recent Images
      for (var i = 0; i < data['ImageAI Recent'].length; i++) {
        ImageRecent.innerHTML += '<div class="cursor-pointer" title='+data['ImageAI Recent'][i].prompt+'>'+data['ImageAI Recent'][i].generated_image+'</div>';
      }
      ImageRecent.addEventListener('click', (e) => {
        if (e.target.classList.contains('ViewableImage') {
          e.stopImmediatePropagation();
          pas.UnitMain.MainForm.Viewer(e.target.outerHTML);
        }
      });
This then gets us to the following display.
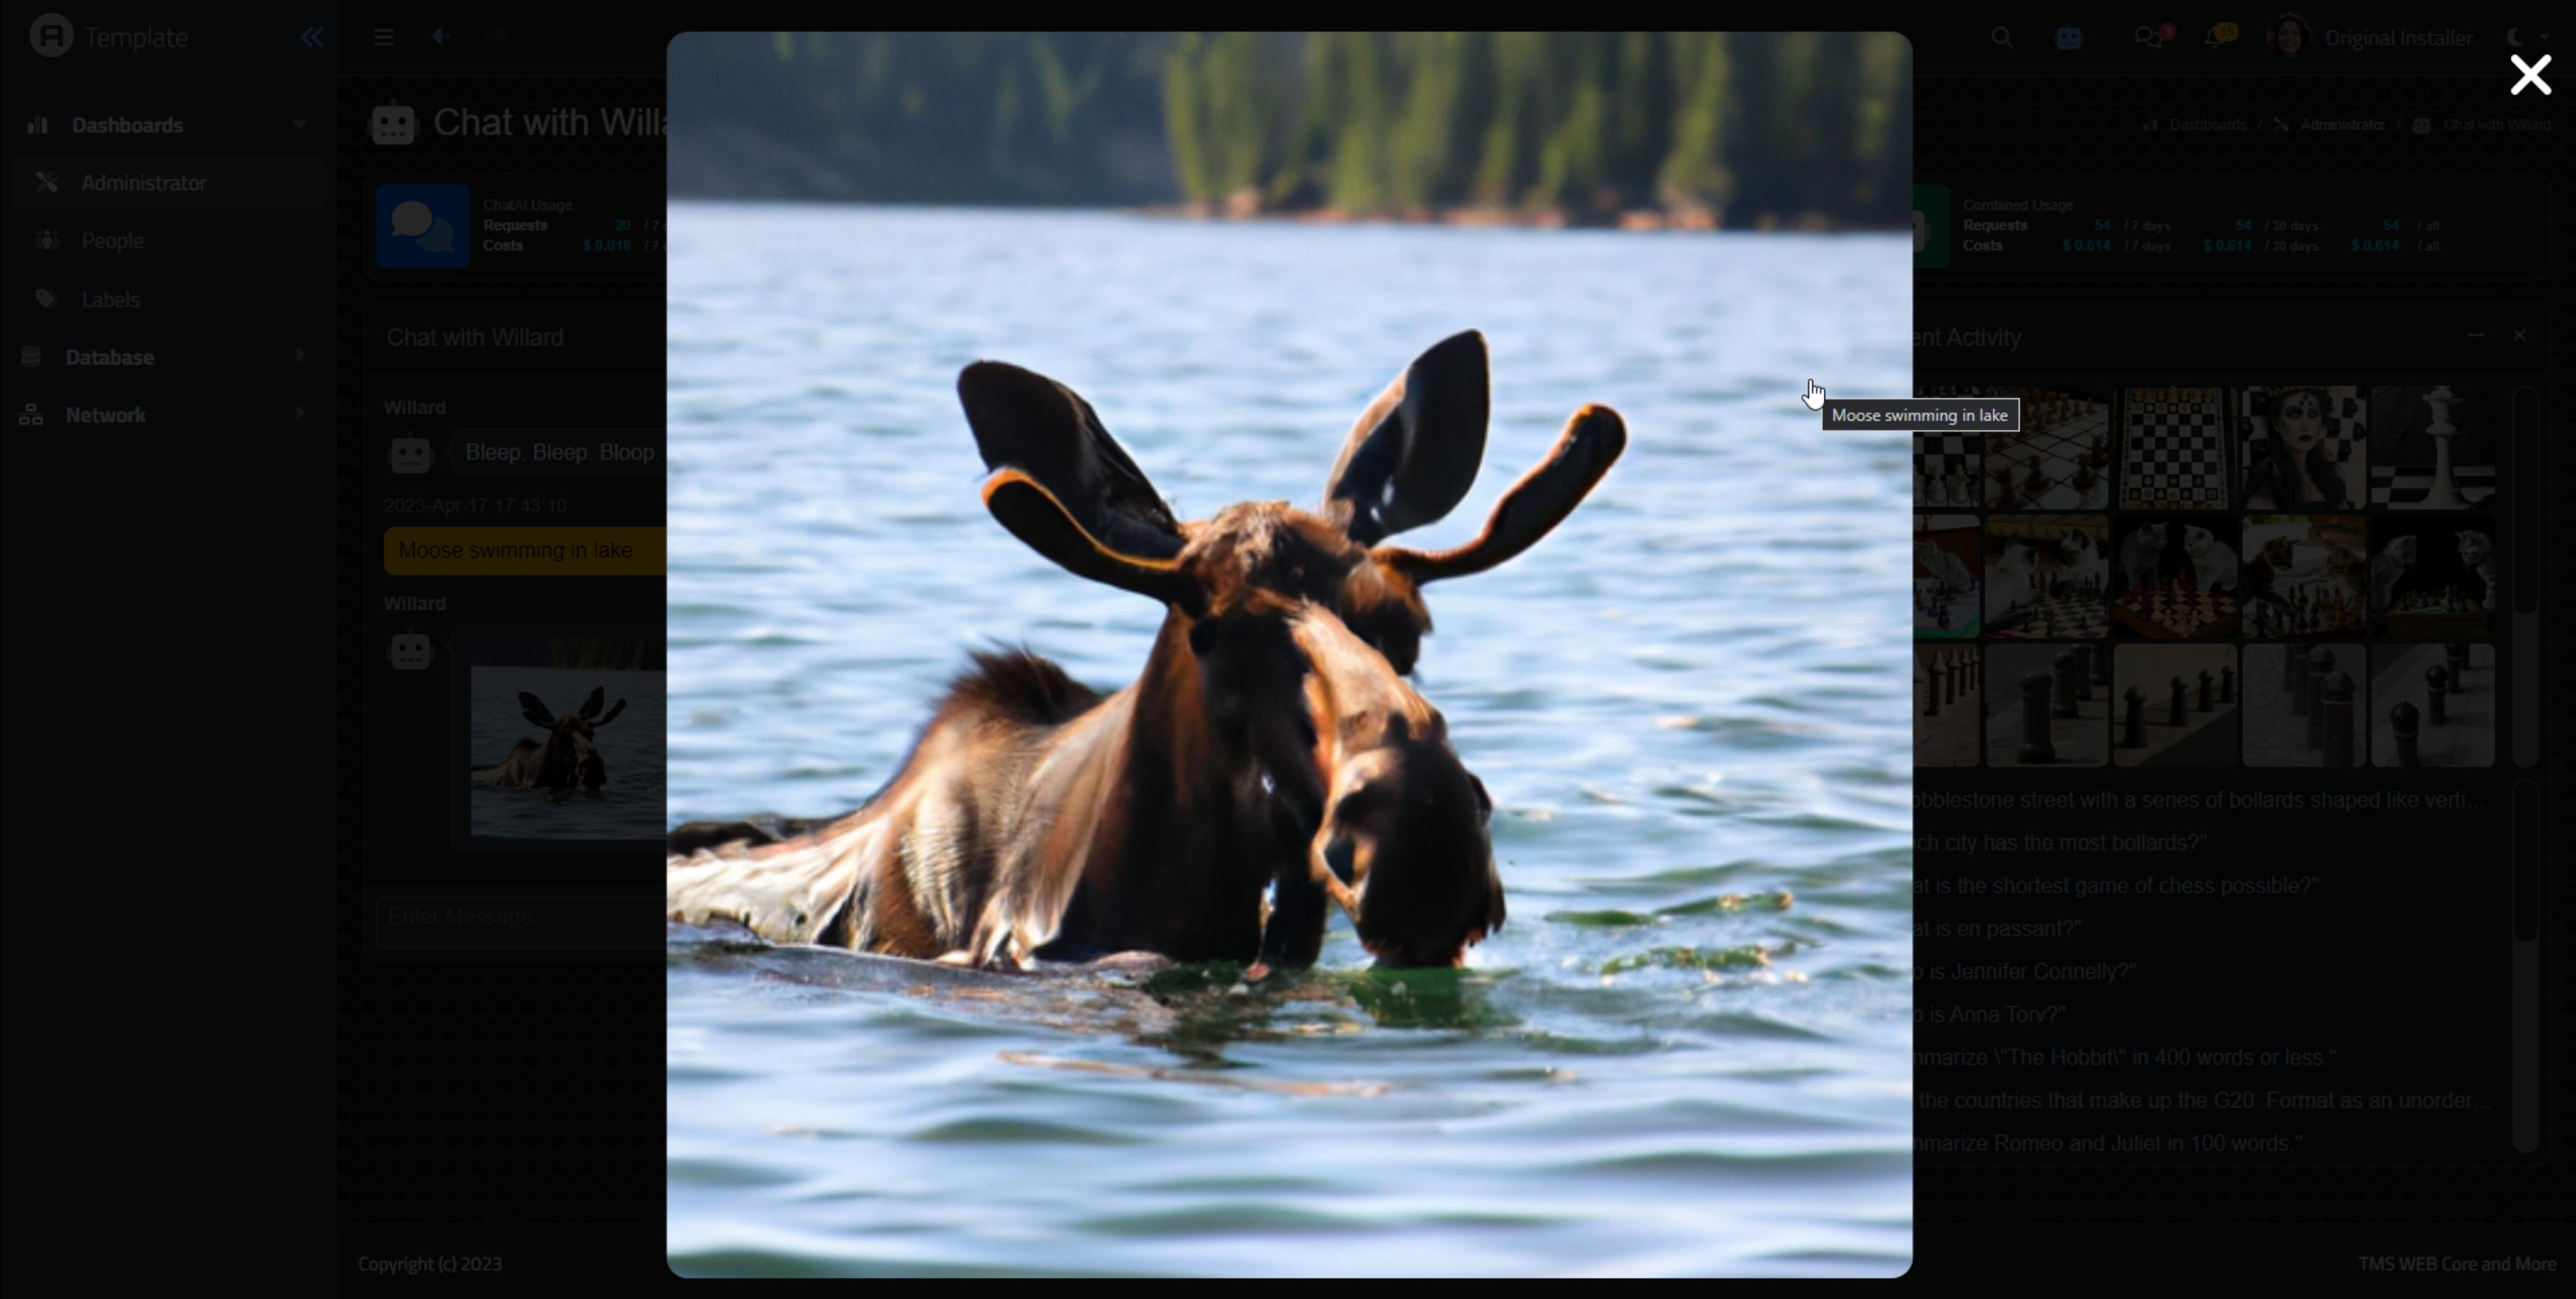
Image Viewer: Moose Swimming in a lake.
The final task is then to display a chat conversation that was previously recorded. The Tabulator record
selected has everything we need for the conversation but doesn't contain any of the time stamps or user
information. The user information is stored in the database, and we know when the conversation took place, but
we're not really all that concerned about displaying this kind of thing in this instance. Just the conversation
itself.
All we're really doing here in terms of coding is repeating what we did for the main chat window. It's a bit simpler in terms of HTML as we don't have to worry about the dates and names, but otherwise very similar. The tricky bit is that the context gets a bit messed up after being moved around, so we have to do a little bit of fiddling to get it back into a JSON form that we can use.
      tabRecentChat.on("rowDblClick", function(e, row){

        // Here's what we're starting with
        var chat = '';
        var conv = row.getCell('conversation').getValue();
        var ctx = JSON.parse('['+row.getCell('context').getValue().replaceAll('\\"','')+']').slice(0,-1);
        var resp = row.getCell('response').getValue();

        // This builds up the container, loads all the classes and so on
        chat = '<section class="w-100 h-100 position-absolute">'+
               '<div class="direct-chat direct-chat-warning border border-secondary bg-dark rounded m-1 pe-3 pb-3 w-100 h-100 position-absolute fs-6">'+
               '<div class="direct-chat-messages p-3 m-2 w-100 h-100 overflow-auto">';

        // Process the context, creating one block per JSON array element
        for (var i = 0; i < ctx.length; i++) {
          if (ctx[i].role == 'assistant') {
            chat += '<div class="direct-chat-msg">'+pas.UnitIcons.DMIcons.Lookup['Robot_Avatar']+'<div class="direct-chat-text">'+ctx[i].content+'</div></div>';
          } else {
            chat += '<div class="direct-chat-msg end">'+pas.UnitIcons.DMIcons.Lookup['User_Avatar']+'<div class="direct-chat-text">'+ctx[i].content+'</div></div>';
          }
        }

        // Add in the last question and the last response, and wrap up our HTML
        chat += '<div class="direct-chat-msg end">'+pas.UnitIcons.DMIcons.Lookup['User_Avatar']+'<div class="direct-chat-text">'+conv+'</div></div>'+
                '<div class="direct-chat-msg">'+pas.UnitIcons.DMIcons.Lookup['Robot_Avatar']+'<div class="direct-chat-text">'+resp+'</div></div>'+
                '</div></div></section>';

        // Submit it to the viewer just like if we were submitting an image
        pas.UnitMain.MainForm.Viewer(chat);
      });
If everything works according to plan, we end up with a display that shows us the entire conversation history and should scroll and otherwise be formatted correctly. There are sometimes little variances in the generated responses that can be a little different in this reproduction. For example, sometimes lists have extra newlines or visible "\n" occurrences. Sometimes these also appear in the original chat, so not much of a concern. We could apply more filters for these conditions if it turns out they are happening frequently enough, both here and in the original chat.
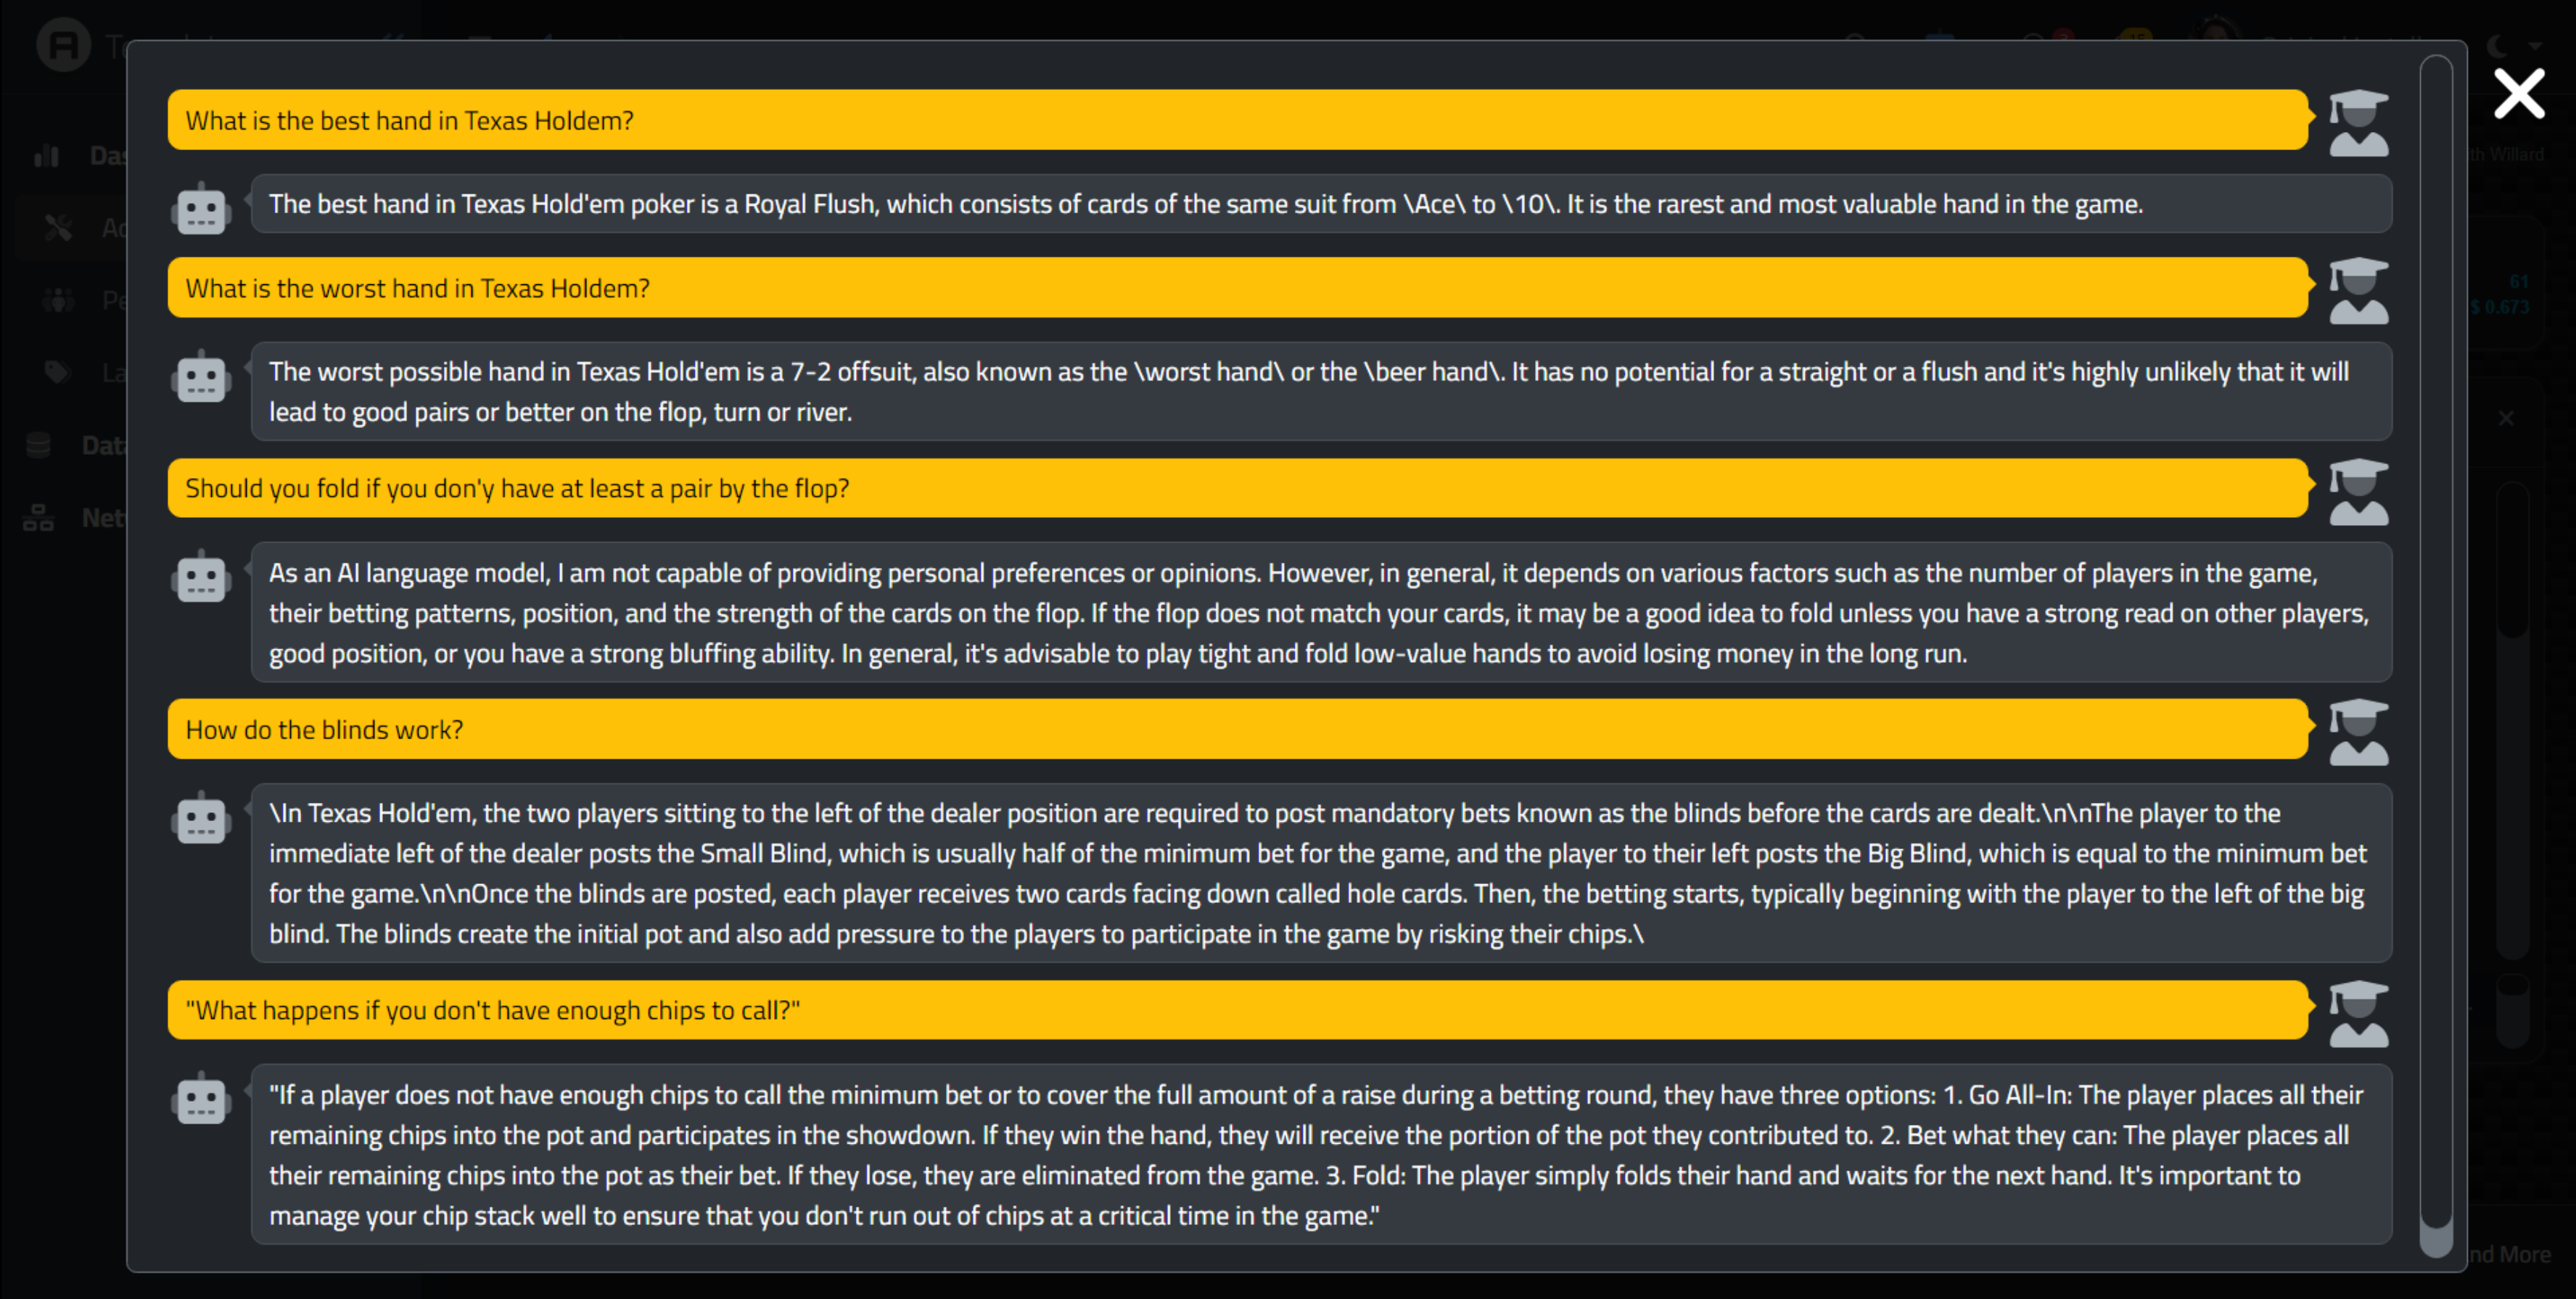
A Recent Chat about Texas Hold'Em.
And that's the last bit of code for our project for today. We've got chats happening, images being generated, everything
tracked in a database, and the means to see past conversations and images. A pretty good start for anyone looking to
incorporate ChatGPT into a TMS WEB Core project. Depending on the kinds of interactions a particular
organization might want to provide to its users, this may be pretty useful already. But this is all just the early
days when it comes to what else might be in store.
More to the Story.
You don't have to spend too much time with ChatGPT to find out that it has a few serious (and sinister!)
limitations. For example, it stopped "learning" new information sometime around September 2021. So
if you ask it questions about anything more current than that, it will naturally provide an answer based on
the information that it has. This is particularly evident when it comes to asking about people who have passed
away.

Not Current Data.
I'm not an expert in AI, nor do I really know how OpenAI has built its model. However, Wikipedia produces a
complete dump of its database on a weekly basis, as do many other large sources of data. And of course, any
kind of search engine will also report more current information.
I would imagine, with their countless
millions of investment dollars, that at some point these kinds of integrations will happen more regularly. It is
a bit curious why this isn't already happening. Surely Microsoft could spare an infinitesimal fraction of their
Azure cloud to pump out new generations of this crunched data in a more timely fashion. And with players like
Google and their vast troves of data vying for a place, one can imagine this isn't going to be a long-term
problem.
In the interim though, there are a couple of interesting options. First, it is possible to train additional data for some models. ChatGPT 3.5, the model that we've been using, isn't one of them. But there are others that could be used here just as easily, that support "fine-tuning" by supplying our own data. The OpenAI services in this space of course incur additional fees. Crunching this kind of data on your own is likely to be prohibitively expensive - very large multi-CPU / multi-GPU systems seem to be the norm of late, and even then there is always an underlying base to start working from that still has the problem of an old training cut-off data.
Another option has to do with tokens. It is possible to "seed" the conversation with other data. So, for example, we could do a Google search (or Wikipedia or anything else potentially relevant) using the original part of the conversation, before any context is generated. We could then use those results as the context for that initial conversation, adding it to the very first call to the OpenAI endpoint. This might very well help address the most obvious problems, like our example above. And when conversations first start, there is no context, so there is a bit of room, at least initially, to help jumpstart the conversation with data that the model doesn't already have.
Amusingly, perhaps, this might set off a few alarm bells, as this is literally how we might "connect an AI to the Internet". This brings up the inevitable comparisons to SkyNet and other science fiction dystopian futures.
From where we are with this project today, however, wiring up an extra internet search when the context is empty (IE, the start of a conversation) is likely very possible with only a few more lines of code. But we're already having to balance things token-wise. For example, if you want a large response, you have fewer options for giving it more data as context. Or if you require a lot of context, you're likely going to be very limited in the responses you can generate. ChatGPT4 and its 32KB token support will likely help a great deal in these cases.
There is also the irony in having to augment an AI with data from a search engine (or from Wikipedia) due to its not having current enough data on its own. Seems kind of odd to have to even consider this approach.
The third and most interesting option, though, is to not use OpenAI at all. There are other projects afoot. One of the more interesting of these might turn out to be GPT4All. This is a project where you can download a model to your computer and run it entirely locally. In fact, the model is only 4GB - enough to load it even onto an old laptop - or so they claim.
In our example, we could perhaps have XData just run a local version of the GPT4All engine and present its results. And this is possibly where things are headed - plenty of people will have an AI of their very own, trained with their own data, biases, and limitations. In the case of GPT4All, training it with new data is still onerous, but it, too, could be hooked up to the internet for an initial boost in the same way.
GPT4All naturally isn't as capable as ChatGPT, and there are larger models that it supports if you
have an interest in using more than 4GB. It isn't hard to imagine in a year or two that all of our phones will have something like this running directly. The next big thing? Perhaps.
And, just to finish up with a bit of fun, ChatGPT apparently knows a thing or two about TMS WEB Core!
The code for this project has been integrated into the latest versions of the TMS
WEB Core Template Demo and the TMS
XData Template Demo Data projects on GitHub. Please check there for the latest updates and any code
changes that will very likely have been made since this post was first created. And as always, if you have any
feedback, please post any comments or questions below.
Follow Andrew on 𝕏 at @WebCoreAndMore or join our 𝕏 Web Core and More Community.
Andrew Simard
Bookmarks:

This blog post has not received any comments yet.
All Blog Posts | Next Post | Previous Post